Weightlifting is not for the fainthearted, but it doesn’t mean you can never work your way towards challenging movements. An exercise appropriate for experienced athletes and lifters, the Sots press may be one of those lifting routines you can’t do just yet. Once you have built enough shoulder and core strength, this is an excellent addition to your training program.
What is the Sots Press?
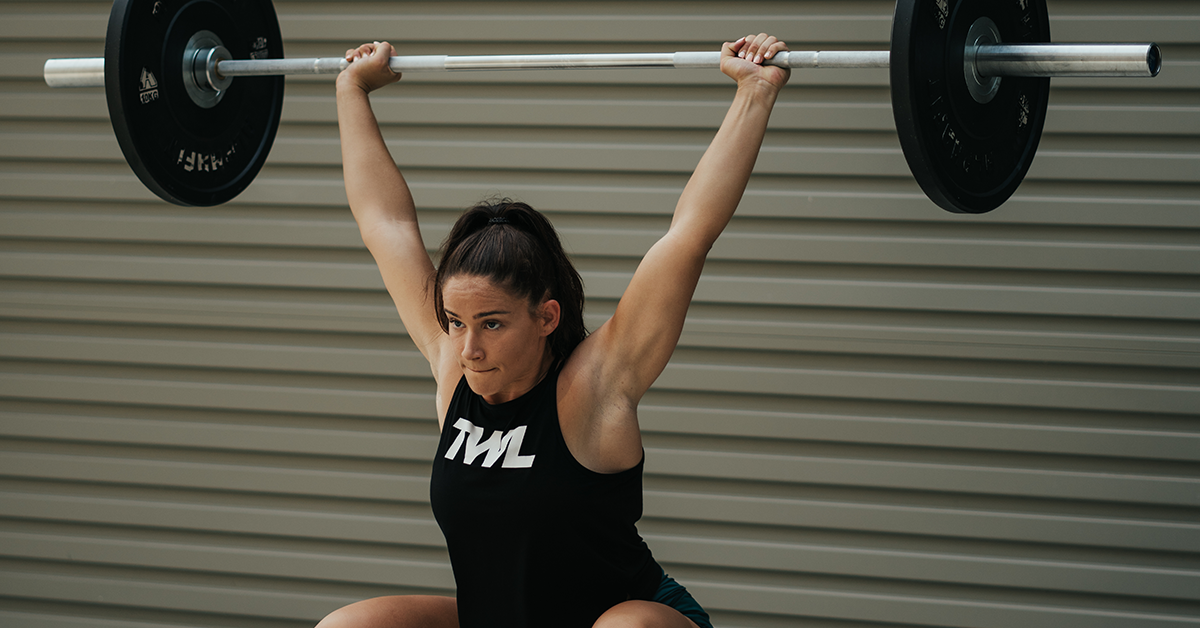
The movement itself is actually quite simple. The Sots press is a behind-the-neck press done in a squat position. You perform it with a snatch grip, so your hands are wide. It’s an advanced exercise you can perform to achieve strong, healthy shoulders, but it can also work for people with limited mobility.
However, it’s best to first perform simpler routines such as the overhead press and overhead squat before exploring the Sots press. Start light and gradually practice until you get to that weight that is feasible to control yet challenges your strength with each repetition.
You will need:
Shop Now
Where Did It Come From?
The Sot press was named after retired Soviet weightlifter Viktor Sots, one of the strongest lifters in the 1980s. The first known athlete to do a power jerk instead of the split jerk in a competition, he set six world records and won many weightlifting championships in the 100-kilogram class. He credits his amazing power jerk technique to the Sots press, a unique exercise he, himself, developed.
Muscles Worked in the Sots Press
This movement primarily works the shoulders, abdominals, and hamstrings. It also engages the traps, triceps, calves, and upper to lower back muscles.
The Sots press can benefit you just as it benefited a weightlifting champion. It’s for athletes and anyone else who wants to improve their full-body strength, balance, and mobility.
How to Do the Sots Press
To do this movement safely, we recommend that you first test your mobility by performing the Sots press with an empty barbell or even a PVC pipe. Then, slowly add weight. Keep in mind that you won’t be lifting as much as you do in a traditional press!
Here’s how we break it down.
- Put the barbell on your back and then squat. (Some people do the Sots press in the front — more on that in a minute.)
- At the bottom of a squat, be sure to keep your core engaged!
- Gradually press the load up, squeezing your shoulder blades until they hit their lockout position.
- Once you have stabilized the weight overhead, slowly lower it back onto your shoulders. That’s one rep.
- When you’re done with the set, finish with the barbell on your back and stand up once again.
Here’s what it looks like:
5 Benefits of the Sots Press
1. Improves Full Body Strength
The Sots press doesn’t just improve shoulder mobility and core strength. The squatting and pressing movements alone strengthen your knees, ankles, thoracic cavity, and upper to lower back muscles, promoting full-body strength
2. Helps Improve Posture
It’s impossible to do the Sots press without the correct posture. But if you don’t have the perfect posture just yet, this exercise is still for you. This movement can address postural dysfunction and help you work your way towards good posture.
3. Improves Balance, Mobility, and Flexibility
The Sots press significantly improves trunk stability and back extension strength. This movement helps you achieve tension, stability, and flexibility while in a squat. The longer you press and remain in a squat position, the more you challenge yourself to balance and stabilize your lower extremities.
4. Perfect for Warming Up
If you’re looking into doing more advanced presses, pull-ups, and squats specifically, the Sots press can be a good warmup exercise (or even an accessory). Eventually, you will develop stronger muscles and build strength to do more complex routines.
5. Effective Corrective Exercise
The Sots press is a corrective movement for those suffering from shoulder and thoracic spine issues. It can also uncover underlying mobility, balance, stability, and motor control deficiencies. However, it’s only for those experiencing mild mobility issues and can do the routine without pain. If the movement is not in range, it can do more harm than good.
3 Sots Press Variations
The Sots press can be modified according to your own strength and fitness level. If you want to challenge your body and take on movements you haven’t tried before, here are some Sots press variations you may want to try.
1. Press in Clean
The press in clean is a more challenging variation of the Sots press (in fact, some people consider this the Sots press), demanding a massive level of thoracic strength and scapular mobility. First, put the bar in the front rack position. Then, squat to your bottom position. Next, press the bar up in a direct line and stay in that overhead position before gradually returning the bar to your shoulders. That’s one rep.
2. One-Arm Kettlebell Sots Press
Using kettlebells is a great alternative. First, hold the kettlebell in the rack position on one side. Then, go into a squat. Press the load overhead while engaging your core. Return the kettlebell to your shoulder. That’s one rep.
3. Partial Sots Press
If you want to stick with the traditional Sots press but your mobility isn’t there yet, work your way toward it by squatting only to parallel and performing the press from there.
The Sots press is indeed challenging, but you can make it easier repetition after repetition by gradually building your strength and increasing your mobility in each position. With the Sots press, you can leverage all the incredible benefits without lifting overly heavy weights. As you start, focus on achieving the proper form with light loads and getting stronger in the process.<